
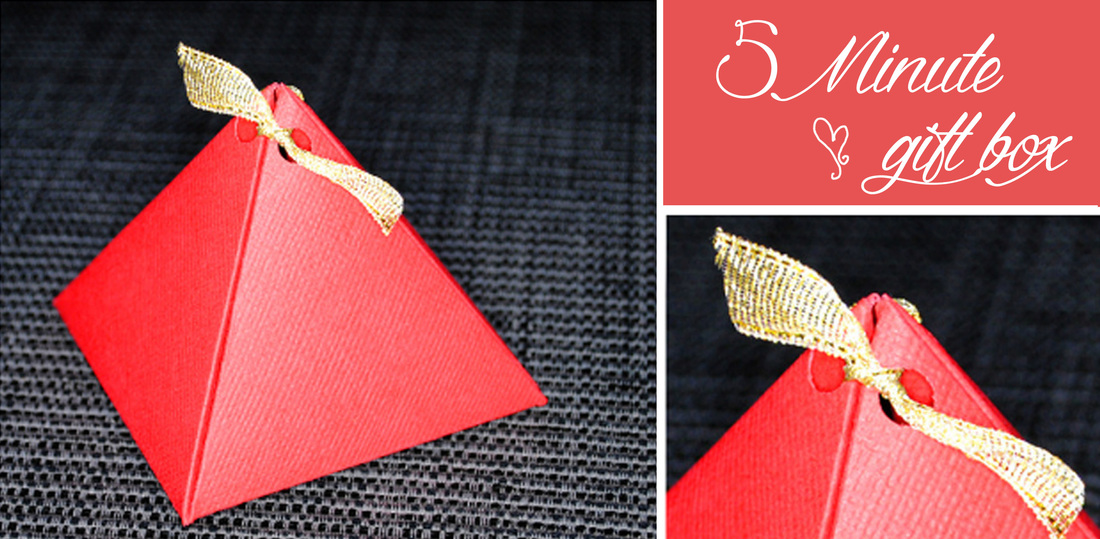
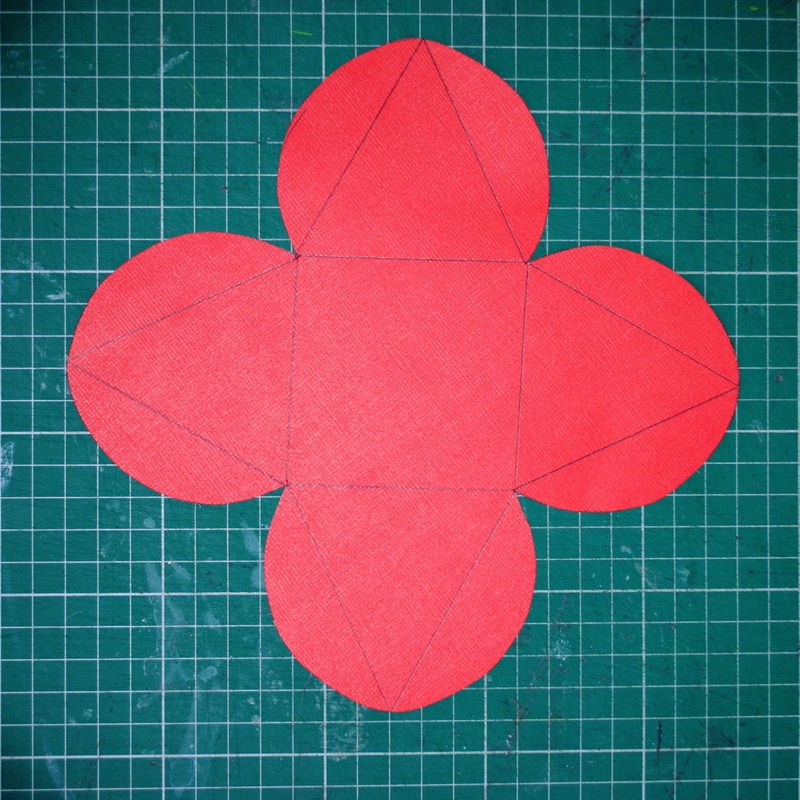
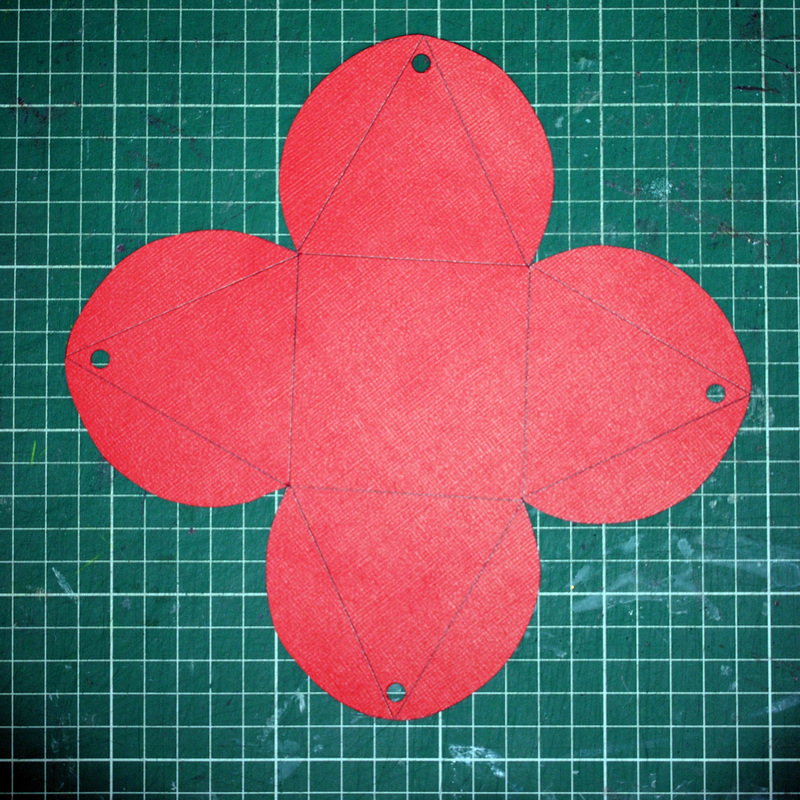
 With Christmas creeping up, I figured it would be a good idea to share another gift box that I've come across over the years. This wee beauty is great for smaller items - make up, trinkets, jewellery... it could maybe even be a creative way to surprise your special someone with a ring! Or maybe you're getting married. Favour boxes anyone? This make is inexpensive, takes very little time, and most people will have all the equipment needed at home, so just about anyone can make it. If you have some nice card (or thick paper), a pencil and ruler, hole punch, pair of scissors and some offcuts of ribbon, you're on your way to making this cute little box. 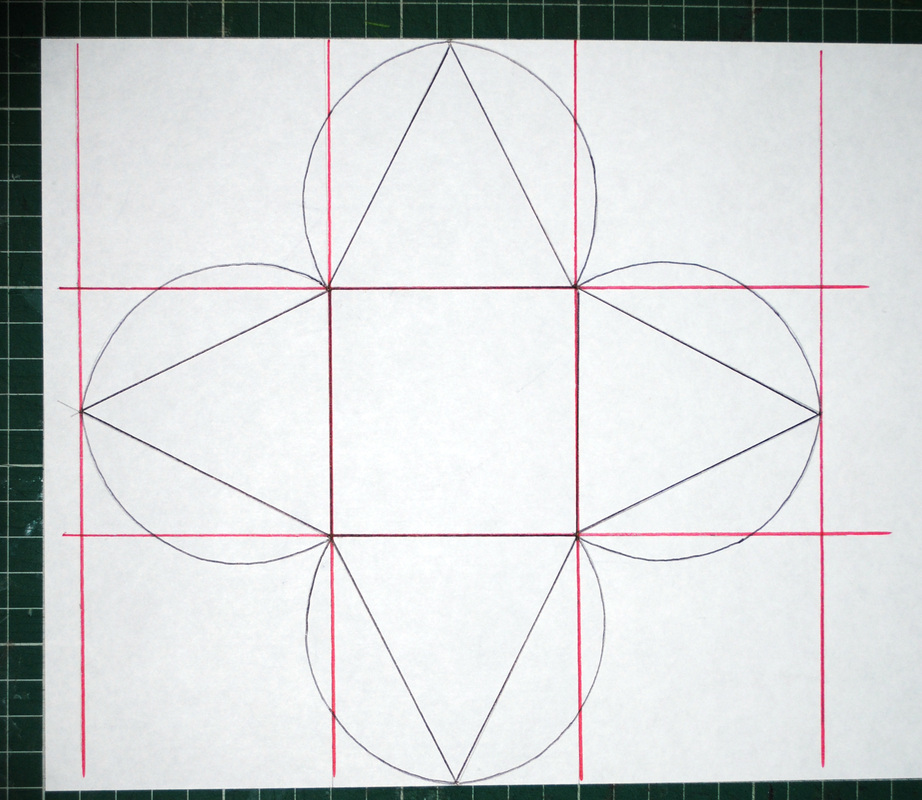 To start with, you need to make a template. I used an A4 page for my box as it's a common size to find lying around the house. You might find this step a little time consuming, but once you have a template drawn you can use it over and over again. I started by drawing the main grid, which consists of nine 7cm square boxes. This is the largest size box you can make with A4 paper. Here are some tip for drawing up your template: - make sure the triangle tabs are the same length as the base, so that they'll meet in the middle. You can scale it up to any size. - to draw your triangles, measure half way along the line that the point will be on, then do dot-to-dot with the base corners. - the circular tabs do not need to be an exact circle (it's better if they're not!). To draw these I used a glass, making sure it touches the point of the triangle and the corner of the base square. NOTE: If you have trouble getting it right, but still want to make the box, send me a message and I'll upload a template for you, which can then be printed out.
Now that you have your template, trace it onto the card you're using, making sure you include the interior lines. Using the hole punch, punch holes at the point of each triangle. They don't need to be in the exact same place, but it'll be easier to thread if they're in a similar position.
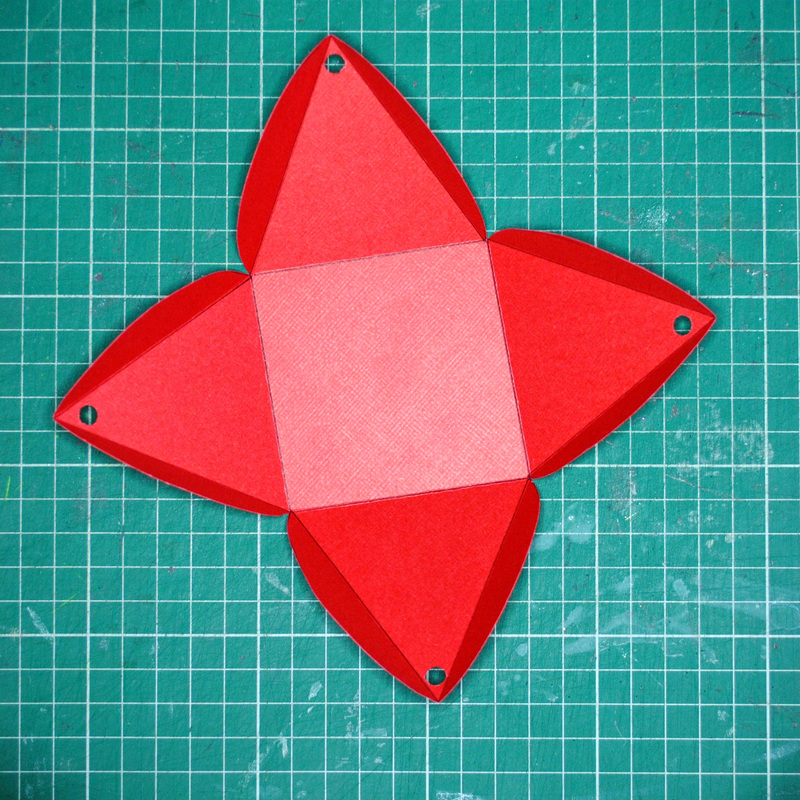
Place a ruler along each line and fold up, creasing well.
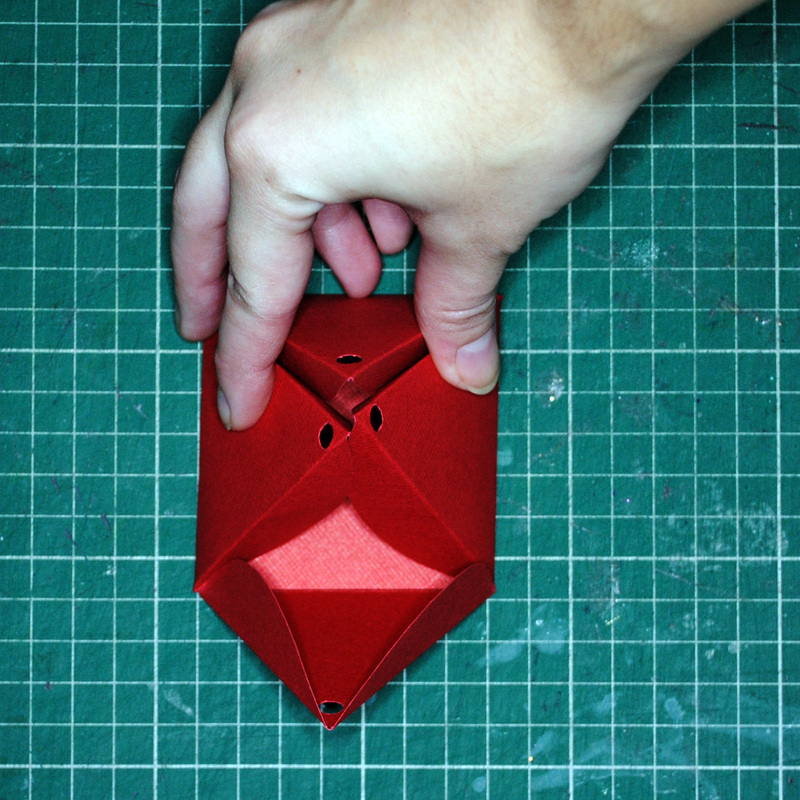
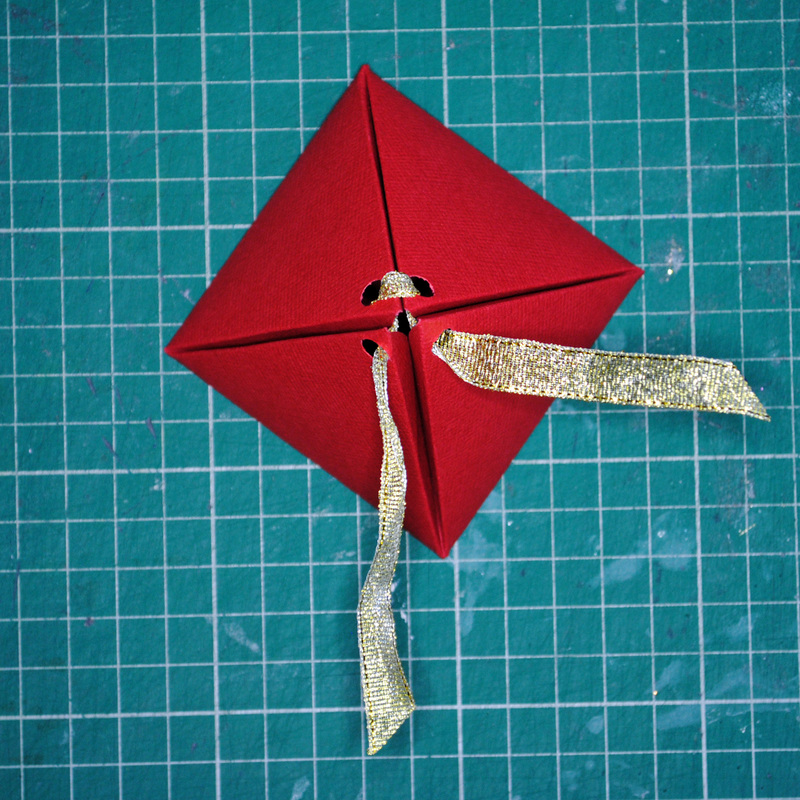
Fold each side into the centre, making sure the circular tabs are folded into the middle - a nice wee pyramid should now be made. Thread your ribbon through each of the holes and tie together. Now sit back and admire you're handy work, and get to filling it! 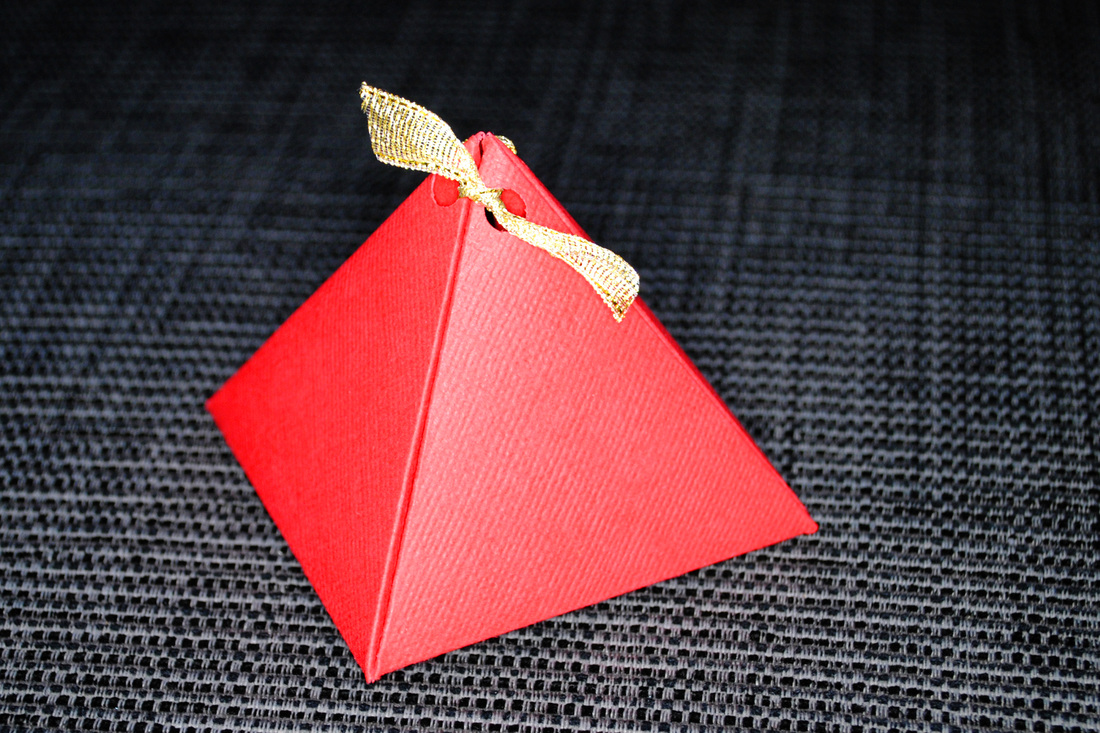
0 Comments
Leave a Reply. |
Archives
October 2016
Categories |

 RSS Feed
